Only update your Precision Fill software if a Technical Brand Ambassador has advised you to. Updating software on older models may cause issues with your Precision Fill.
Tools Required
-
USB Disk
- Computer
- Precision Fill Update File (provided by your Technical Brand Ambassador)
- USB right-angle adapter (depending on size of USB, Precision Fill Mini only)
1. Formatting the USB Disk
We recommend using a new or formatted (empty) USB disk. The USB Disk must be formatted to the file system FAT32.
Note: The following step will erase all contents of the USB Disk.
Windows: Right click the USB Disk, select 'Format', choose 'FAT32' under File System and check 'Quick Format', and click 'Start'
MacOS: Open the Disk Utility app, select the USB Drive, click Erase, and choose MS-DOS (FAT) under Format, and Master Boot Record for Scheme.
2. Copy Software onto the USB Disk
Copy the entire folder named 'AMP_Upgrade' to the USB Disk. It's important you do not change any folder or file name. The folder should be in the root of your disk. (Appears instantly when you open the USB Disk).
Right click and Eject the Disk to safely remove.
3. Updating the Precision Fill
Open the left side panel of the Precision Fill, to get to the back of the screen, and you'll find a USB port, insert the USB here. On the Precision Fill Mini, you may need a USB right-angle adapter.
For Precision Fill Mini V2, you can open the front panel.
Press and hold anywhere on the screen, while turning the Precision Fill on, and hold until the progress bar has completed. You'll be present with the following screen.
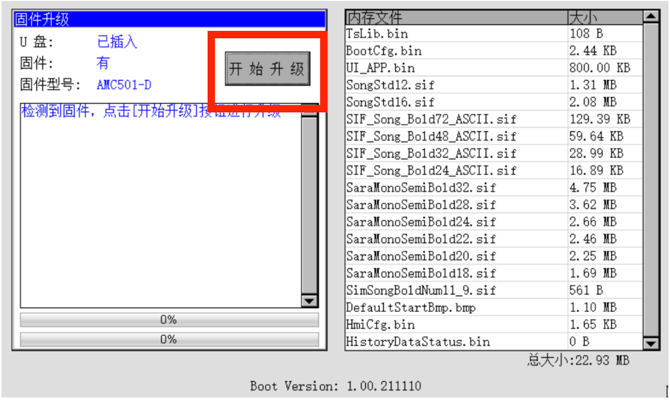
Once loaded, press the button highlighted above to start the upgrade.
If the button is not displayed, please refer back to Step 1 and 2 to ensure the USB drive has been correctly formatted, and the software file has been copied correctly.
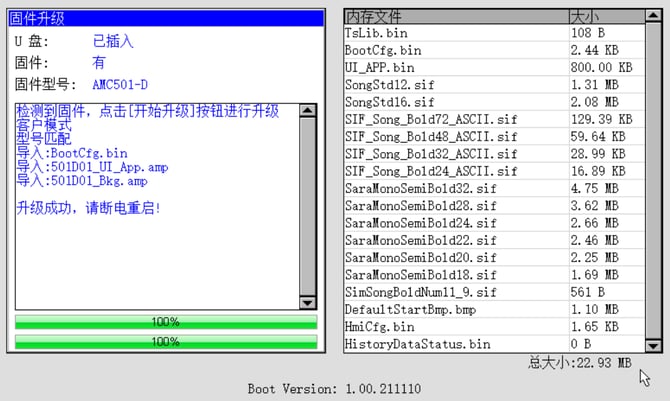
Once the upgrade has completed, you'll see both progress bars at the bottom reach 100%. After this has completed. You can turn off the machine, and turn back on again to start normally.