
| Estimated Time | Up to 15 minutes |
|---|---|
| People Required | 1 |
| Difficulty | Easy |
| Tools Required | Cabinet key (supplied with your machine), cleaning materials, e.g. soft brush and dry lint-free cloth |
Before You Begin
Keeping the inside of your weighing bucket clean helps every bag come out consistent!
The weighing bucket is the stainless steel container inside the lower cabinet of your machine. It holds each portion of coffee while it is weighed, then releases it into the bag. Over time, coffee oils, chaff and fines build up inside it, and a quick clean keeps it working as it should.
This guide applies to both the Precision Fill and the Precision Fill Mini.
No tools are needed to remove the front plate. Every fixing is designed to be loosened and tightened by hand.
If at any point you are unsure or uncomfortable, stop and contact Technical Service before continuing.
Step 1 — Switch Off and Open the Cabinet
Estimated time: Less than 1 minute | 1 person
⚠️ Switch off the machine and isolate the air supply before reaching inside the cabinet. The bucket is opened and closed by an air-powered cylinder, and if it moves while your hand is inside it can trap your fingers and cause injury.
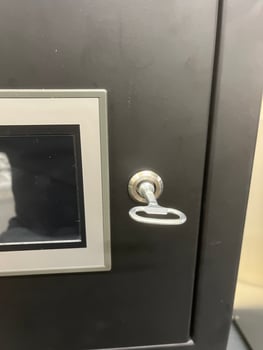
Insert the cabinet key into the lock on the front door, to the right of the screen.
Turn the key and open the door to reveal the weighing bucket.
Step 2 — Loosen the Wingnuts on Either Side
Estimated time: Less than 1 minute | 1 person
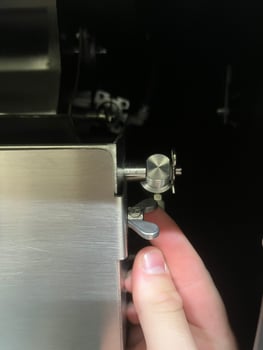
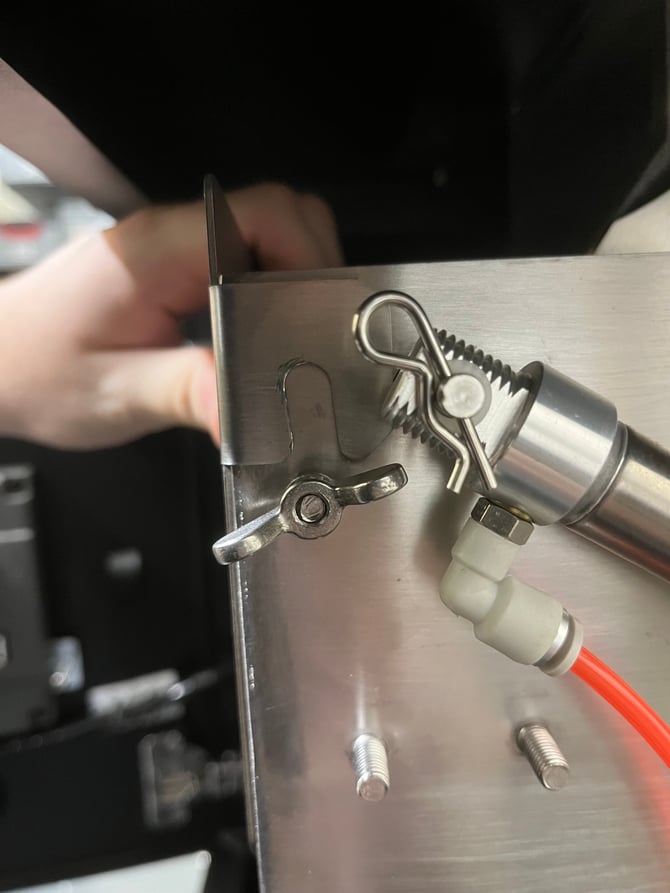
There is a wingnut on each side of the bucket, at the top of the front plate. The front plate sits on these by a slotted tab, so you only need to loosen them, not remove them.
Turn each wingnut anticlockwise a few turns by hand until the tab on the front plate is free to slide. Do not take the wingnuts fully off, they are small and easy to lose inside the machine.
Step 3 — Loosen the Dial on the Front
Estimated time: Less than 1 minute | 1 person
Near the bottom of the front plate there is a black star-shaped dial. This holds the bottom of the plate in place.
Turn the dial anticlockwise by hand to loosen it. Again, there is no need to remove it completely.
Step 4 — Lift Off the Front Plate
Estimated time: Less than 1 minute | 1 person
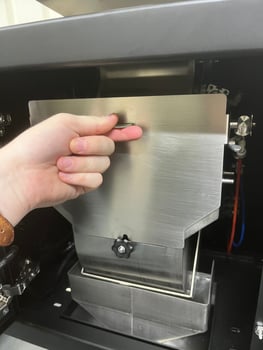
Hold the front plate by the top edge and lift it straight up. The slotted tabs on each side will slide up and off the wingnuts.
Set the plate down somewhere clean and flat, so it does not pick up dust or get scratched.
Step 5 — Clean Inside the Bucket
Estimated time: [CONFIRM: Up to 5 minutes] | 1 person
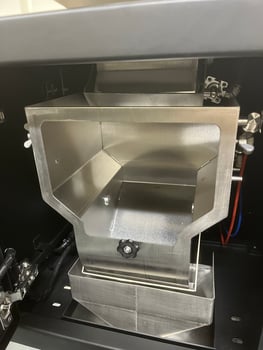
With the plate off, you have clear access to the inside of the weighing bucket.
Check that no loose coffee or cloth fibres are left behind before refitting the plate.
Step 6 — Refit the Front Plate
Estimated time: Less than 5 minutes | 1 person
Refitting is the same process in reverse.
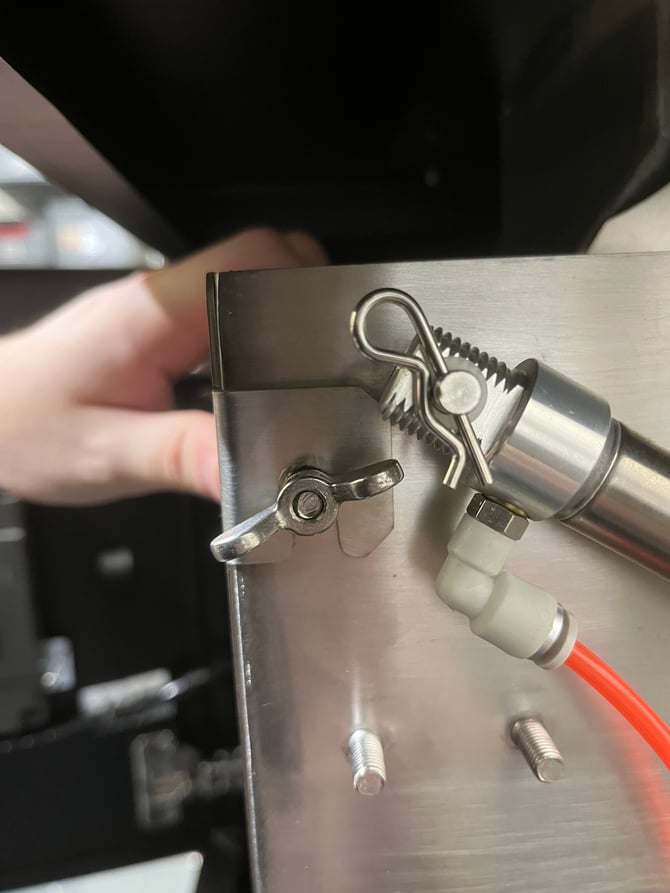
Lower the front plate back into position, guiding the slotted tab on each side down over its wingnut. The tab should sit fully down, with the wingnut at the bottom of the slot.
 |
 |
Tighten the dial at the bottom of the plate by hand.
Tighten both wingnuts by hand until the plate is held firmly. Give the plate a gentle push to check it does not move.
Close the cabinet door and lock it with the key. Restore the air supply and switch the machine back on.
What's Next
Your weighing bucket is clean and ready for your next run.
If the plate does not sit flat, the bucket does not open or close smoothly, or your fill weights look different after cleaning, it is always better to check now than to discover a problem mid-run. Contact Technical Service and we will help you get it sorted.