
| Estimated Time | Up to 1 hour |
| People Required | 1, with 2 to 3 people to lift the machine onto your bench |
| Difficulty | Intermediate |
| Tools Required | 8mm socket with impact driver, 10mm socket & 5mm Allen key |
Watch the Video
Prefer to follow along? Watch the full walkthrough below, then use the written steps as your reference.
Please note, this video is out of date. It shows an earlier version of the Precision Fill Mini, and we're working on a new video that will be available very soon.
When watching, you can skip the steps for building the air regulator, this now comes already fitted inside the machine. Where the video and the written steps below differ, follow the written steps.
Before You Begin
Congratulations on your Precision Fill Mini, you're nearly there!
Have your bench ready first. The machine comes out of the crate and goes straight onto its bench, so clear the space before you open the crate. Make sure your bench is sturdy, level and able to safely hold the machine's 78kg.
Have your air supply and power ready. You will need a compressed air line with a 6mm push-fit fitting and a power socket close to the bench. Any new air or electrical supply must be fitted by a qualified tradesperson in line with your local regulations.
Do not connect air or power until Step 6. Once air is connected, the moving parts inside the machine can operate, so finish all the work inside the panels and underneath the machine first.
If at any point you are unsure or uncomfortable, stop and contact Technical Service before continuing.
Step 1 — Open the Crate
Estimated time: Up to 15 minutes | 1 person
Before you touch anything, take a photo of the crate on all sides. If there is any damage from shipping, these photos make a claim much simpler.
Using an 8mm socket, remove the screws around the lid and lift it off.
Using the same 8mm socket, remove the screws holding the side walls of the crate and lift the walls away.
Step 2 — Lift the Precision Fill Mini onto Your Bench
Estimated time: Less than 5 minutes | 2 to 3 people
⚠️ The Precision Fill Mini weighs 78kg. Lifting it with too few people risks serious injury and may cause the machine to fall and be damaged. Always lift with at least two people, bend at the knees, and wear safety gloves and steel-toe boots.
Your accessories box is usually packed underneath the body of the machine, resting on the legs. Take it out and set it aside before you lift. It contains your power cable and foot pedal, which you will need in Step 6.
With two or three people, lift the machine from the crate base and place it on your bench. Lift from the body of the machine, not from the hopper or the funnel.
Step 3 — Unwrap and Inspect
Estimated time: Up to 15 minutes | 1 person
Remove all the plastic wrapping from the machine.
Walk around the machine and check for any dents, scratches, loose parts or damage to the panels. If you find anything, take photos straight away and contact Technical Service before going any further.
Step 4 — Remove the Side Shipping Supports
Estimated time: Up to 15 minutes | 1 person
For a dedicated guide to this step, see Removing the Precision Fill Mini Shipping Supports.
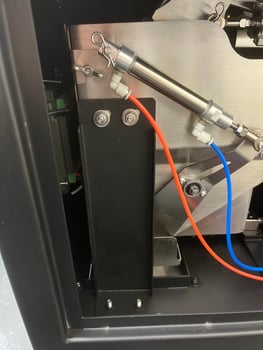
The shipping supports are black metal brackets that hold the weighing section still while the machine is in transit. There is one behind each side panel. The machine cannot weigh accurately until they are removed.
Open the side panel. Lift the handle up, then twist it down, and open the panel.
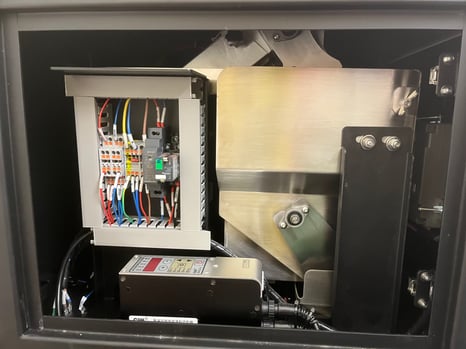
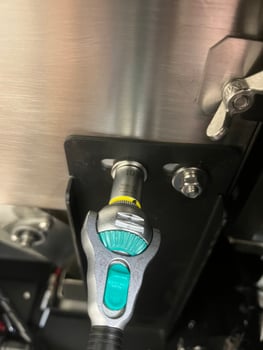
Remove the top nuts. Using a 10mm socket, remove the two nuts and washers at the top of the shipping support.
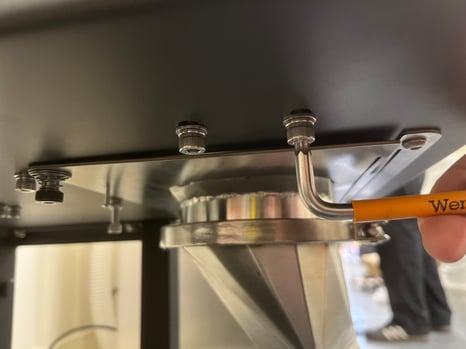
Remove the bottom screws. The bottom of the support is held by screws that you reach from underneath the machine. Using a 5mm Allen key, remove these screws.
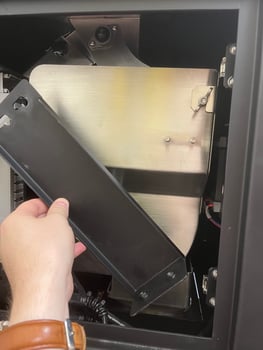
Lift the shipping support out of the machine.
Close the electrical side panel.
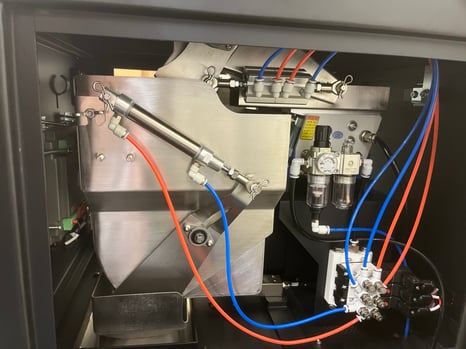
Repeat on the other side. Open the opposite side panel, where the air components are, and remove the second shipping support in the same way. Leave this panel open, you will need it in Step 7.
 |
 |
|---|---|
| Before: support fitted | After: support removed |
Keep both shipping supports and their fixings somewhere safe. If you ever move or ship the machine, we recommend refitting them to protect the weighing section in transit.
Step 5 — Remove the Load Cell Support Underneath
Estimated time: Less than 5 minutes | 1 person
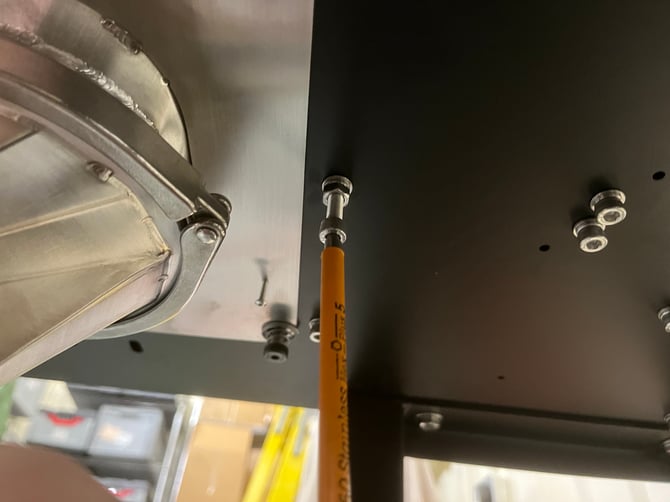
The load cell is the sensor that weighs each bag as it fills. Underneath the machine there is a support bolt that locks the load cell in place for shipping. It must be removed, otherwise every weight reading will be wrong.
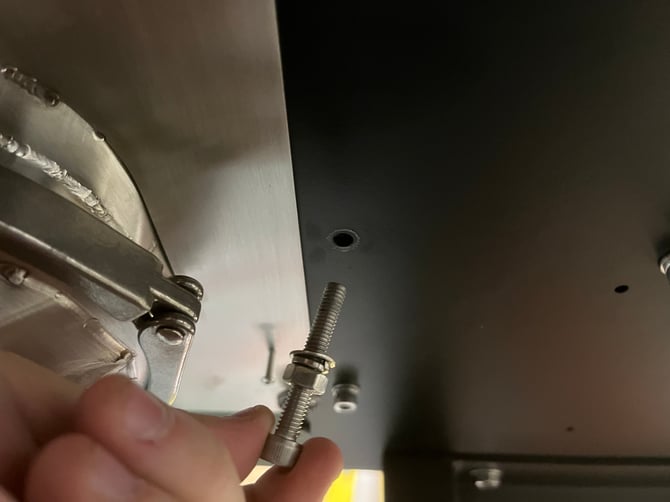
Using a 5mm Allen key, unscrew the bolt and remove it completely, along with its nuts and washers.
 |
 |
|---|---|
| Before: support bolt fitted | After: support bolt removed |
Keep the bolt with the shipping supports from Step 4.
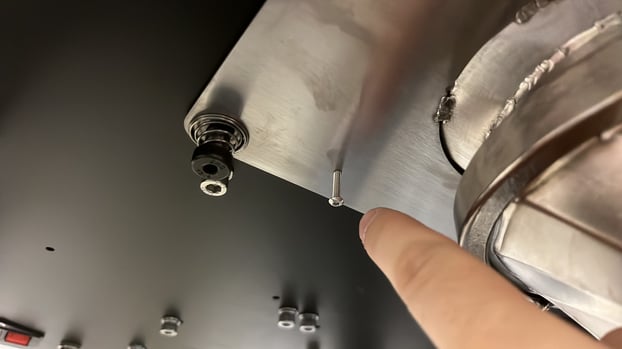
Ergo-fill only. If your machine does not have Ergo-fill, skip to Step 6. Gently pull the funnel towards you, towards the front of the machine. If it clicks into place, the Ergo-fill is set and you can move on.
If it does not click, find the Ergo-fill adjustment screw underneath the machine, next to the funnel. Turn it in a little by hand, then pull the funnel towards you again to check for the click. Repeat until the funnel clicks into place. No tools are needed.
Step 6 — Connect Air, Power and the Foot Pedal
Estimated time: Less than 5 minutes | 1 person
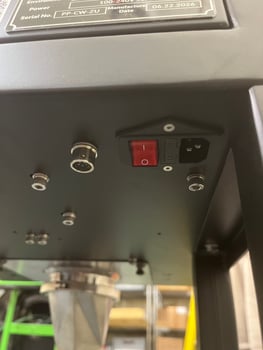
⚠️ Check that the power switch on the back of the machine is set to O (off) before plugging in. Do not connect to a power supply that has not been fitted and tested by a qualified electrician.
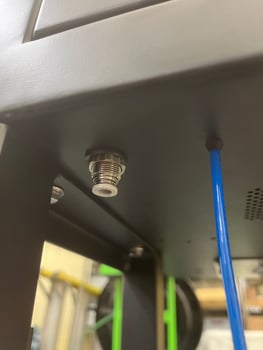
Air. Push your 6mm air line firmly into the push-fit connector on the back of the machine until it stops. Give it a gentle pull to make sure it is held.
Foot pedal. Plug the foot pedal from your accessories box into the round connector on the back of the machine, next to the power switch.
Power. Plug the power cable from your accessories box into the socket on the back of the machine, then into your power supply.
Turn on your air supply. Listen for any hissing from the air connections. If you hear a leak, turn off the air supply and push the line back in firmly. If it continues, contact Technical Service.
Step 7 — Set the Air Pressure
Estimated time: Less than 5 minutes | 1 person
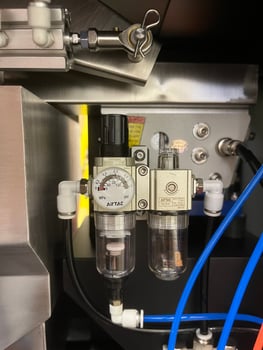
The air regulator is the dial unit inside the side panel that controls how much air pressure reaches the machine. Your air supply must be connected and turned on before you set it, otherwise the gauge will read zero.
Remove the plastic cover from the air regulator.
Pull the black dial on top of the regulator upwards to unlock it. Twist the dial until the gauge reads 0.4 MPa, then push the dial back down to lock it.
Close the side panel.
Switch the power on using the red switch on the back of the machine.
What's Next
Your Precision Fill Mini is unpacked, connected and switched on. Before you fill your first bags, work through one of these:
- Calibrating Your Precision Fill Mini
- Setting Up a Recipe on Your Precision Fill Mini
- Installing Your SOVDA Lift
If anything did not look or sound right during setup, contact Technical Service.