
| Estimated Time | 5 minutes |
| People Required | 1 |
| Difficulty | Easy |
| Tools Required | 3-in-1 oil, or an air tool oil rated ISO 32 / SAE 15W. A ladder, if the top of your Lift is out of easy reach. |
Before You Begin
We recommend oiling your air solenoids annually to keep the valves moving freely.
The regulator and solenoid box sit on the top part of the Lift, so you may need a ladder to reach them comfortably. Make sure the ladder is stable and on level ground before climbing.
For oil, you have two options. Ordinary 3-in-1 oil is available at almost any hardware store. Alternatively, you can use a specialist air tool oil rated ISO 32 / SAE 15W. This gives slightly better moisture resistance, but lubricates no better than 3-in-1 oil, so either is fine. The link above is a generic example, not a recommendation of a specific brand.
If at any point you are unsure or uncomfortable, stop and contact Technical Service before continuing.
Step 1 — Shut Off and Relieve Air Pressure
Estimated time: 1 minute | 1 person
⚠️ Do not disconnect an air line while it is still pressurised. This can cause the line to whip or the fitting to release suddenly, which risks injury.
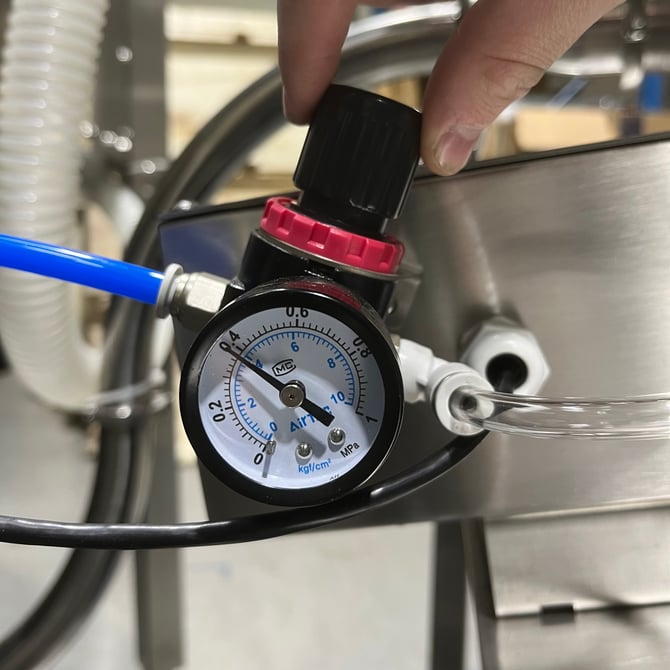
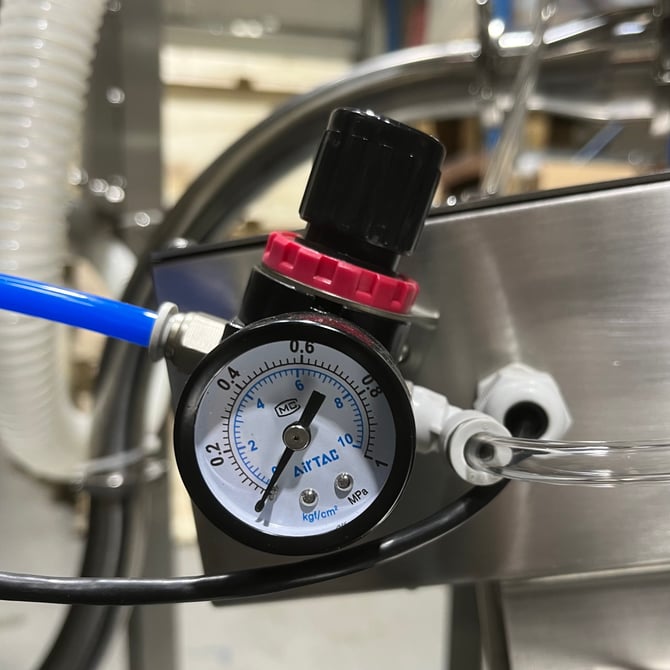
Close your air shutoff and drain all air pressure from the system. You can do this either by discharging the line with an air gun, or by turning your regulator down to 0.
 |
 |
Step 2 — Disconnect the Air Line
Estimated time: 1 minute | 1 person
On the SOVDA Lift, disconnect the push-connect line on the outside of the box that runs from the regulator.
To release a push-connect fitting, push the collar around the tube down into the fitting body, then pull the tube straight out. Don't pull on the tube before pressing the collar in, this will not release it and may damage the fitting.
If you have a Precision Fill or Precision Fill Mini, skip ahead to the note at the end of this step.
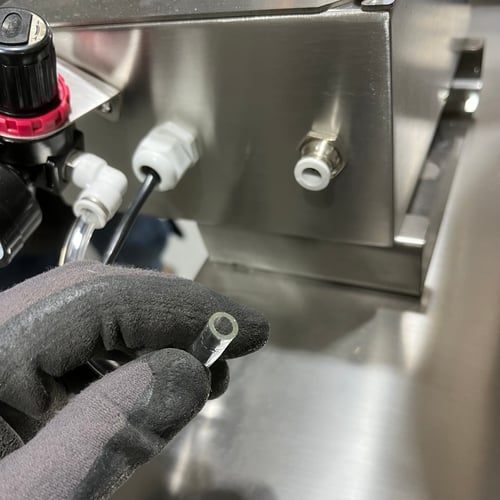
Precision Fill / Precision Fill Mini: the same method applies, but instead of the regulator line, disconnect the air-in tube using the same push-collar-and-pull method.
Step 3 — Add the Oil
Estimated time: 1 minute | 1 person
Add a few drops of oil to the air tube you've just disconnected.
Step 4 — Reconnect the Line and Restore Air Pressure
Estimated time: 1 minute | 1 person
Push the tube back into the push-connect fitting until it seats fully, then restore your air supply, either by opening the shutoff valve again or turning your regulator back up to its normal working pressure. The valve needs to be reconnected and pressurised before you cycle it in the next step, cycling it while disconnected won't move any air through the solenoid.
Step 5 — Cycle the Solenoid Valve
Estimated time: 1 minute | 1 person
Cycle the valve several times so the oil works its way through the solenoid, this is the electrically-controlled valve that switches the air on and off. You can do this by letting the lift run through several normal cycles.
We recommend doing this with no coffee loaded in the machine, and checking the bottom of the internal butterfly valve, this is the flap inside the air line that opens and closes to control airflow, once you've finished cycling it.
What's Next
Run the machine through a normal cycle to confirm the valve is moving smoothly.
If the valve still feels stiff, sticks, or doesn't fully close after oiling, contact Technical Service rather than continuing to force it — include your machine's serial number, which valve is affected, and a short video of the behaviour if you can.