
| Estimated Time | Up to 30 minutes |
| People Required | 1-2 people |
| Difficulty | Easy |
| Tools Required | Adjustable open-ended spanner, pipe cutters |
Before You Begin
How you fit the lance depends on your setup:
- If your lift has a full pipe run to a hopper as well as a lance, fit the lance Y valve into that run by swapping your 400mm pipe for the shorter 320mm pipe — this makes room for the valve.
- If you have a lance-only lift, connect a flexi-pipe adapter after your 600mm 90-degree pipe, then connect a second adapter to the lance piece and the flexi-pipe.
Step 1 — Fit the Lance Y Valve into Your Pipe Run
5 minutes | 1 person
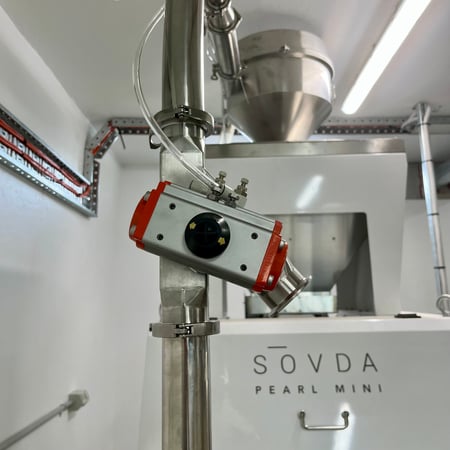
Following whichever setup applies to you from Before You Begin, fit the orange lance Y valve into position in your pipe run.
Full lift with lance
Remove your 400mm pipe and replace it with the shorter 320mm pipe, this makes room for the valve. Fit the orange lance Y valve into the gap this creates in your pipe run. Connect one end of a flexi tube to that adapter, then connect the other end of the flexi tube to a second adapter. Connect that second adapter to the lance itself.
Lance-only lift
Connect a flexi-pipe adapter to the Y valve. Connect one end of a flexi tube to that adapter, then connect the other end of the flexi tube to a second adapter. Connect that second adapter to the lance itself.
Step 2 — Fit the 8mm Elbow Fittings to the Valve
5 minutes | 1 person
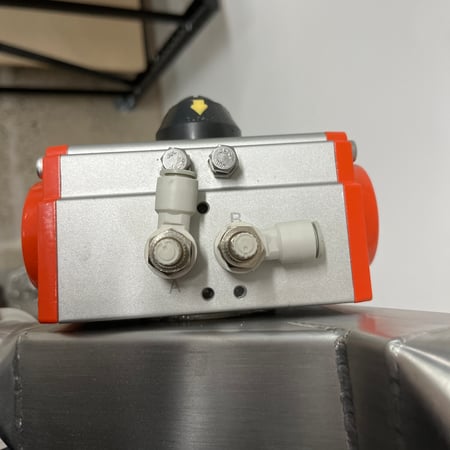
At each end of the valve you'll find two threaded ports, labelled A and B. Screw an 8mm elbow fitting into each port using a spanner.
The plastic elbow turns independently of the metal screw thread. Once the fitting is tightened, you can rotate the elbow to point in whichever direction suits your pipe run — you don't need to loosen it to do this.
Step 3 — Connect the Valve to the Solenoid Box
5 minutes | 1 person
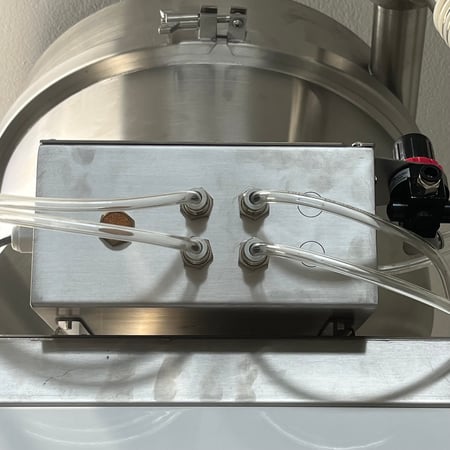
Run 8mm flexi-pipe from each elbow on the valve to the matching elbow fitting on the back of the solenoid box.
Step 4 — Mount the Lance Holder to the Hopper
5 minutes | 1 person
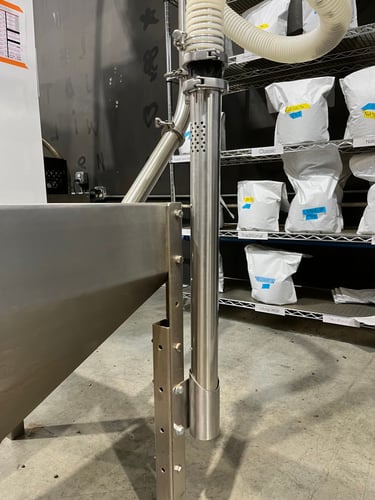
Bolt the lance holder to the side of the hopper by using the existing screws securing the additional leg. The holder has several bolt positions, this lets you set the height of the lance to suit your hopper.
If you do not have a hopper, you'll have a holder that will be able to be bolted into the floor.
What's Next
Return to Lift Uncrate & Assembly Guide to continue your installation.