
|
Estimated Time |
Up to 15 minutes |
|---|---|
| People Required | 1 |
| Difficulty | Easy |
| Tools Required | Flat-head screwdriver |
Before You Begin
Adding sensors to your hopper only takes a few minutes, and you're nearly there!
Your hopper arrives with a metal blanking insert already screwed into each sensor position at the bottom of the hopper. You will swap each insert for a sensor, one at a time.
Your hopper uses two sensors. Each one has its own cable, labelled Sens. Power and Sens. Signal.
It does not matter which sensor goes into which position on the hopper. Either sensor can be fitted in either position.
Handle the sensor cable with care. Always hold the sensor by its body, never by the cable. Pulling or twisting the cable can rip the connections inside the sensor, and the sensor will stop working.
If at any point you are unsure or uncomfortable, stop and contact Technical Service before continuing.
Step 1 — Remove the Blanking Insert
Estimated time: less than 5 minutes | 1 person
Find the sensor position at the bottom of the hopper. It is a short round fitting with a metal insert inside, marked with a single slot across its face.
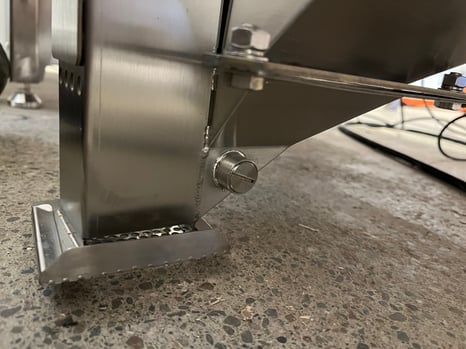
Place a flat-head screwdriver in the slot and turn it anticlockwise to unscrew the insert. Keep the insert somewhere safe, in case you ever need to remove the sensor and close the opening again.
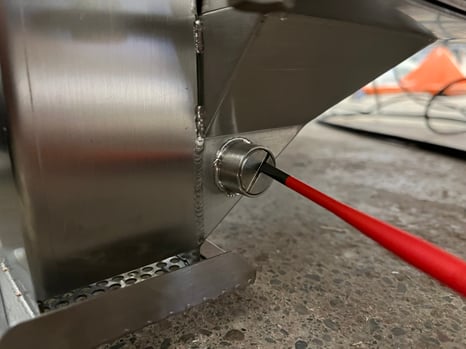
Step 2 — Screw In the Sensor
Estimated time: less than 5 minutes | 1 person
⚠️ Do not twist or pull on the cable while fitting the sensor. This can rip the internal connections and damage the sensor beyond repair.
Hold the sensor by its body and screw it into the fitting by hand, turning clockwise. Let the cable turn freely with the sensor as you go, so it never winds up or pulls tight.
Screw the sensor in by hand only. Do not use a tool on the sensor body, this can crack the housing or damage the threads.
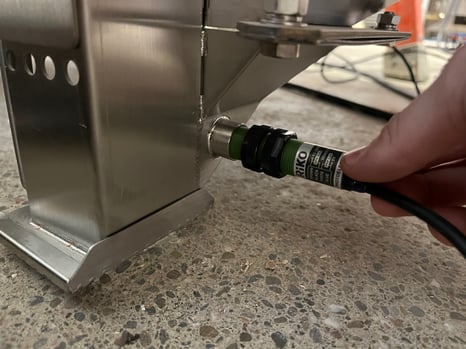
Step 3 — Check the Sensor Sits Flush Inside the Hopper
Estimated time: less than 5 minutes | 1 person
Look inside the hopper at the sensor position. The front of the sensor should sit flush with the inside wall of the hopper. It should not stick out into the hopper.
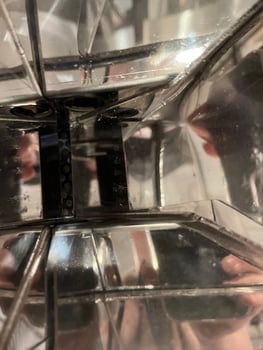
If the sensor sticks out, unscrew it slightly until it sits flush. If it sits too far back, screw it in a little further. Once it is in the right place, tighten the black locking nut on the sensor up against the fitting by hand to hold it in position.
Repeat Steps 1 to 3 for the second sensor.
Step 4 — Connect the Sensor to Your Control Box
Estimated time: less than 5 minutes | 1 person
Run the cable from the sensor to your control box. Leave a little slack at the sensor end so the cable never pulls on it, and avoid tight bends or sharp edges along the way.
Plug the sensor cables into the Sens Power and Sens Signal on your control box.
What's Next
Your sensors are fitted but will not work until you switch them on in your control box settings. Follow Enabling Sensors on your Universal Control Box to enable them.
If a sensor is not responding once enabled, or you notice any damage to a sensor or its cable, contact Technical Service.