
| Estimated Time | Up to 30 minutes |
|---|---|
| People Required | 1 |
| Difficulty | Easy |
| Tools Required | Pipe cutter, adjustable open-ended spanner |
Before You Begin
A double cyclone has two bean inlets at the top, each fitted with its own two-way valve. The valves work together, when one opens the other closes, so beans are always directed into just one cyclone at a time.
If you have a SOVDA Vacuum Box, it comes with a three-way valve shaped like a "T" — this looks similar but is a different part. Make sure you're fitting the two-way valves here, not the three-way valve.
If at any point you are unsure or uncomfortable, stop and contact Technical Service before continuing.
Step 1 — Fit the Two-Way Valves to the Bean Inlets
Estimated time: 10 minutes | 1 person
Fit one two-way valve directly onto each of the two bean inlets at the top of the cyclone. Use the pipe cutter to trim any pipe to length before fitting.
Step 2 — Fit the 8mm Elbow Fittings to Each Valve
Estimated time: 10 minutes | 1 person
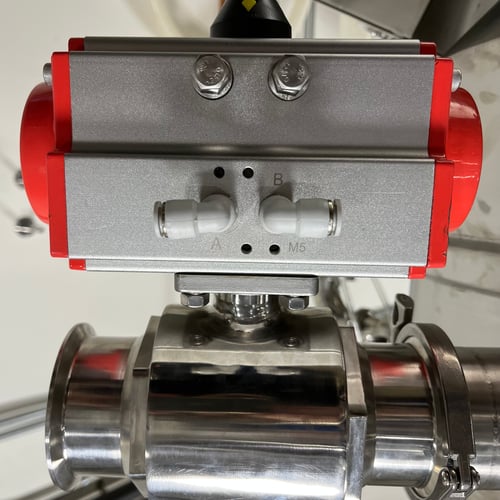
At each end of both valves you'll find two threaded ports, labelled A and B. Screw an 8mm elbow fitting into each port using an adjustable open-ended spanner.
The plastic elbow turns independently of the metal screw thread. Once tightened, you can rotate the elbow to point in whichever direction suits your pipe run — you don't need to loosen it to do this.
Step 3 — Connect the Valves to the Solenoid Box
Estimated time: 10 minutes | 1 person
Because the two valves work together, each connection needs to run between opposite ports on the two valves before it reaches the solenoid box.
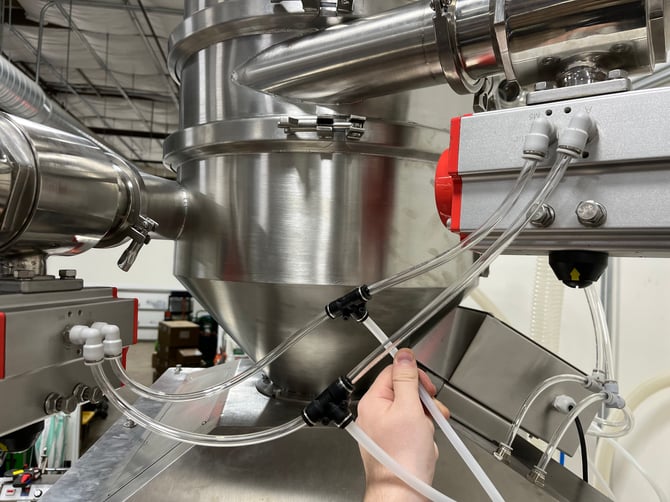
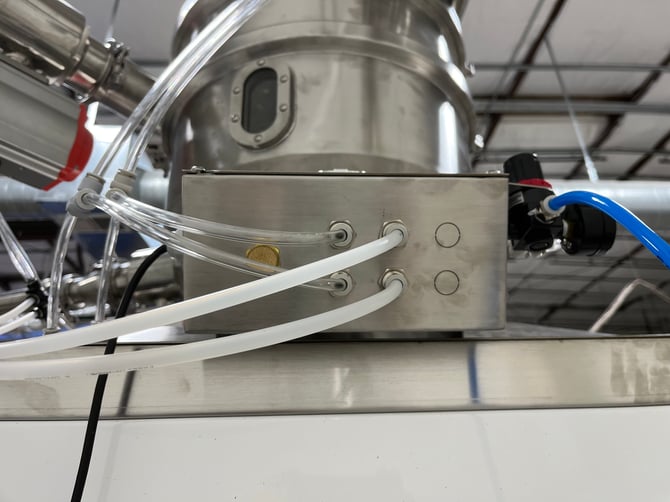
Connect port A on the top valve to port B on the bottom valve, using 8mm flexi-pipe joined with an 8mm push-fit T-connector. Run the T-connector on to the top connection on the back of the solenoid box.
Repeat this on the other side: connect port B on the top valve to port A on the bottom valve, join with a second T-connector, and run this to the bottom connection on the back of the solenoid box.
Changing Which Hopper Is 1 and 2 on your Control Box
If you need to swap which hopper is assigned to 1 and 2 on the Control Box, use the air regulator to bleed the air from your lift system first.
⚠️ Bleed the air before disconnecting any tubing. Disconnecting a pressurised line can cause the tube to whip loose and risks injury.
Once the air is bled, swap the two air tubes (top and bottom) that run from the back of the solenoid box to the two-way valves.
What's Next
Return to Lift Uncrate & Assembly to continue your installation. It's always better to contact Technical Service now if anything looks different from what's shown here, rather than discover an issue once the lift is running.